Lets Make a Game #1: Sprites, Objects and Rooms
With introductions out of the way, let dive in to making your first assets in Gamemaker!
Sprites
Given that you are in the business of making games here, you need something to draw to the screen! A sprite is a term in the games industry for an individual graphic in the game, particularly a 2D image, that originated in the days of 8 bit graphics. Although it is recommended to use a dedicated image editing program such as Photoshop, GIMP, Aseprite etc. Gamemaker does include a basic image editor that can be used to quickly create simple sprites.
![]()
Initially, lets create a simple sprite that can be used to represent your player (don’t worry, you will make it look nicer later on). To create your first object, right click on the Objects group in the Asset Browser and click on Create > Object. You will be prompted to name the new sprite. Because this will be for your player, call it spr_player. It is a useful practice to name your assets with a prefix denoting their asset type, both to avoid confusion and to allow duplicate asset names for different asset types, eg. you cannot have a sprite and a sound both called heal, but you can have a sprite called spr_heal and a sound called snd_heal. You may rename assets by right clicking on them in the Asset Browser and selecting Rename.
![]()
Your new sprite has been created! If you double click on spr_player in the Asset Browser, you will notice that the Inspector will now show more details about spr_player, and a floating window with a control panel and preview of the sprite has opened in the middle of the Workspace. The Import button is used to import any external image files into Gamemaker, however as you will be using the built in sprite editor for now, click on Edit Image. Keep the default 64px x 64px size and settings for now, and start with a simple green square. Select the Bucket tool in the bottom right and change your colour to green, then click in the empty canvas to fill it with green. That will work for now. To leave the sprite editor, click the cross in the corner of the sprite editor tab, or if you wish to keep the sprite editor open you may simply switch back to the Workspace tab.
![]()
One last step, change the sprite origin from top left to middle center. The origin of a sprite is precisely which part of the image will be drawn at the coordinates on the screen you choose, among other things that will be covered later. Now you have a sprite for the player, it is time to create an object for it!
![]()
Objects
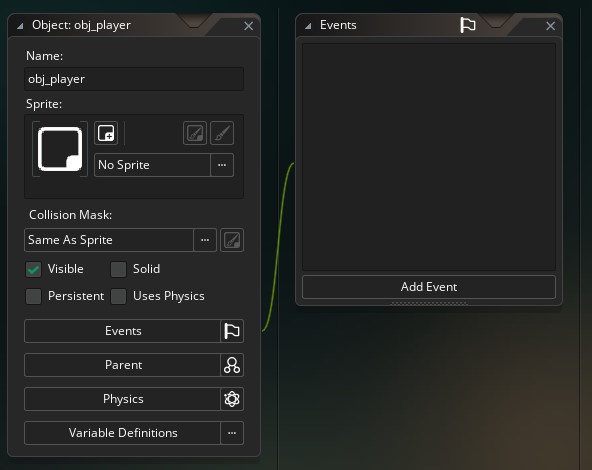
To create our first object, right click on the Objects group in the Asset Browser and click on Create > Object. Because this will be your player object, call it obj_player. Notice that a couple of floating windows have opened in the Workspace, the left window being a kind of control panel and the right window entitled Events. In the left control panel, you can assign a sprite to be used by the object, so click on the button which currently says No Sprite and assign the spr_player sprite which you just created. Now turn your attention to events. Events determine exactly when the code in your objects will run. Below is a brief introduction to the three most common events that you will be using here, however feel free to read about the other events that are available as they all have specific use cases.

- CREATE: The Create event will run once when an object is created, before any other events. The primary use of the Create event is to define variables, functions and initial values that will be used by the object
- STEP: The Step event will run once every frame of the game. By default, Gamemaker games will run at 60 FPS (this can be changed in the settings but it is recommended you leave this at 60), so the Step event for each object will run 60 times per second.
- DRAW: The Draw event will also run once every frame of the game, after the Step events of every object are finished. The Draw event does exactlywhat it says, it is the event where you can draw sprites to the screen.
For now, create a Create event by clicking Add Event > Create, then double click it to open a code window. This code window can be maximised to fill the workspace if you would like. It is time to write your first line of code (hooray!). Lets start with the classic “Hello, World!” program. Type the following code in the Create event code window:
show_debug_message("Hello, World!");
The show_debug_message function prints a string (more on strings soon) to the debug console in the bottom dock, and is a great way to get visual feedback that your code is working as intended (or not), display the contents of variables, and much more.

The next step is to add this object into our actual game.
Rooms
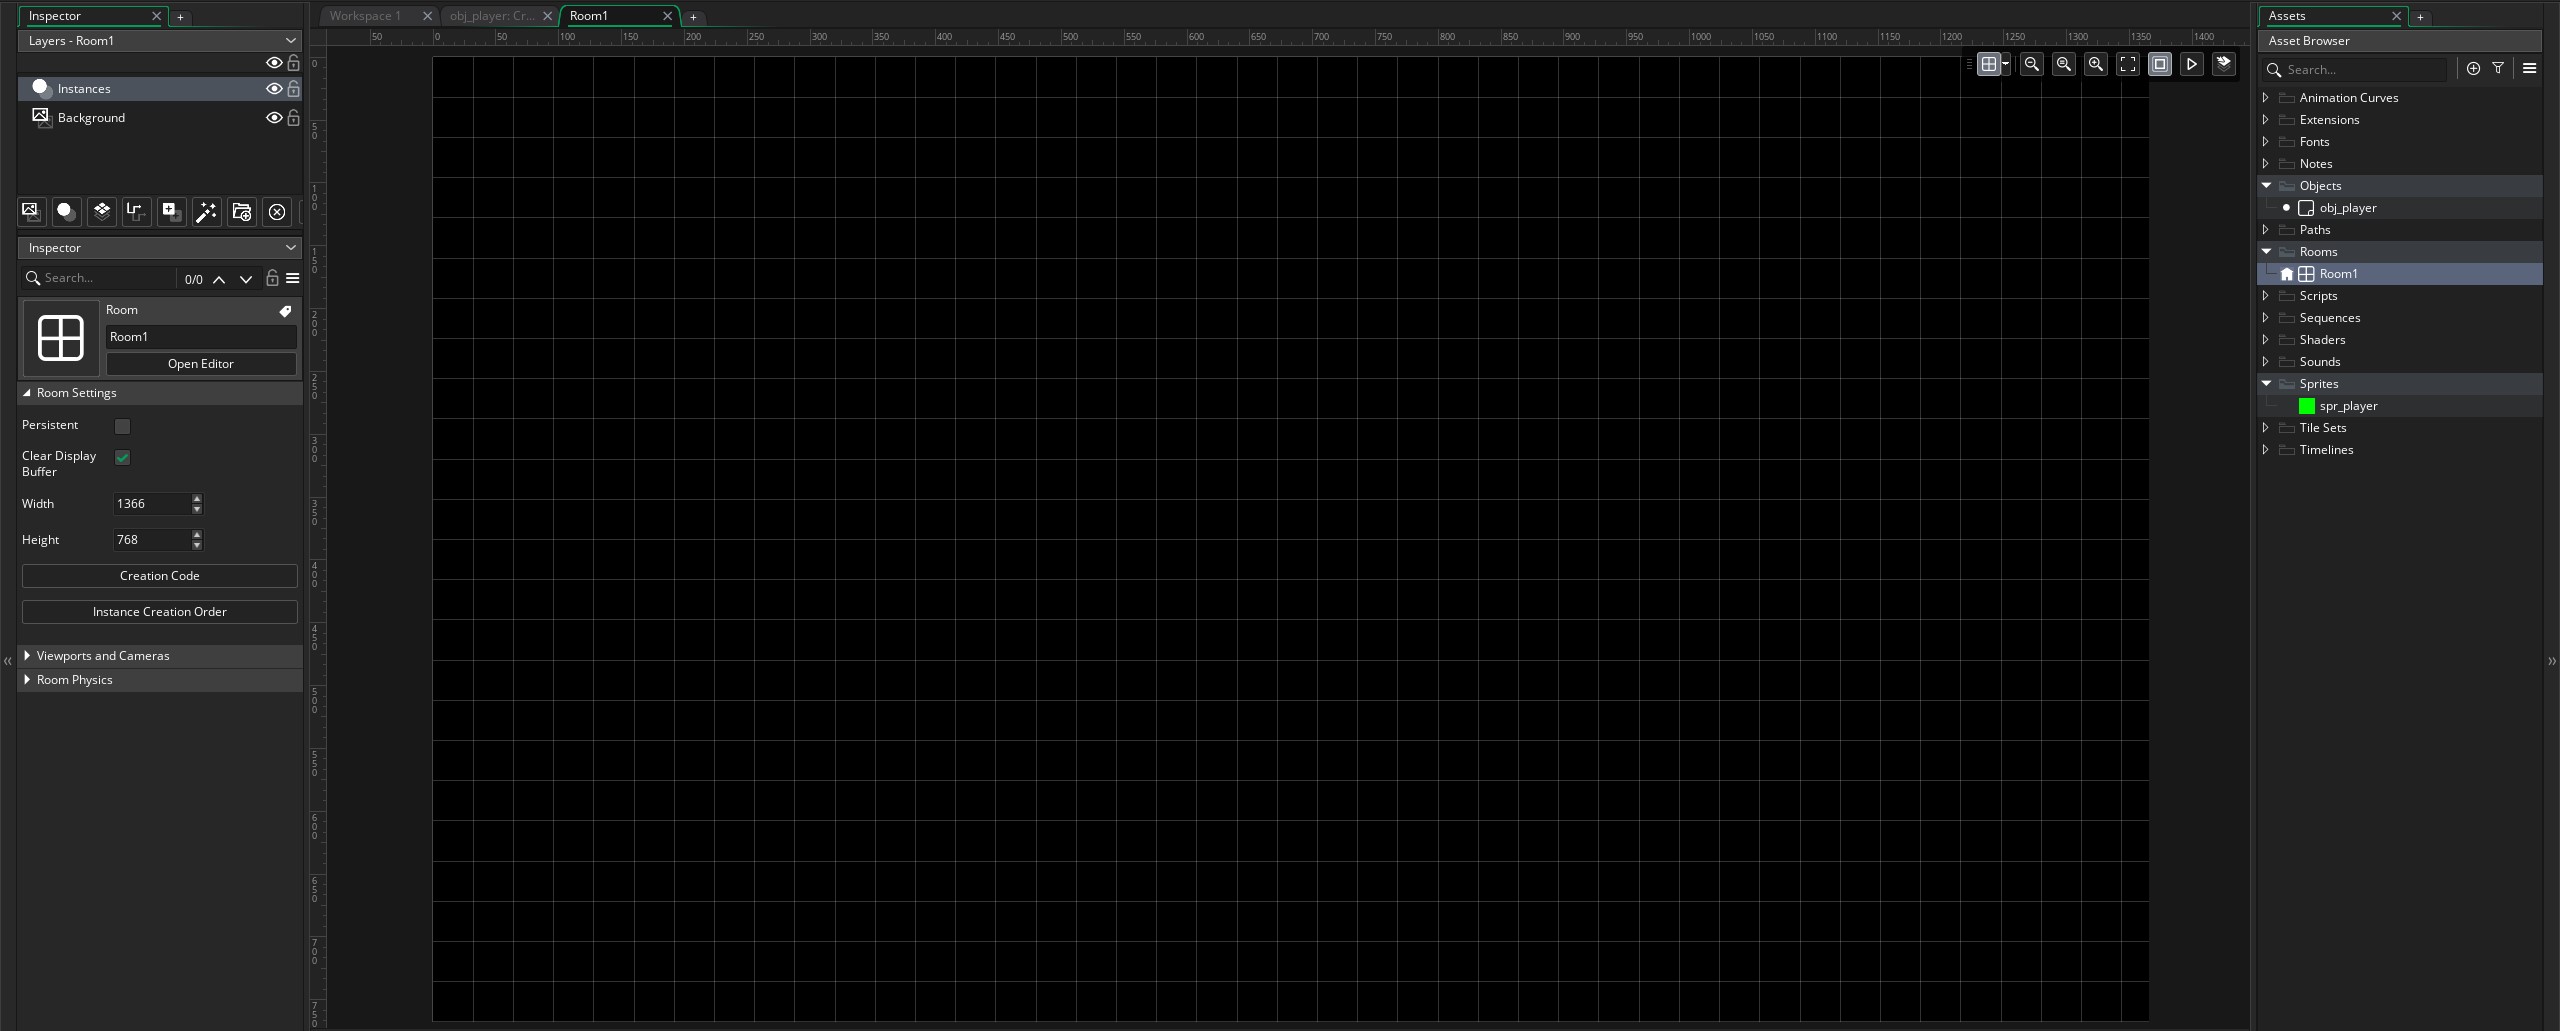
A room in Gamemaker is where your game world lives. Each room is a specific width and height, and your objects, sprites, tiles, background etc. can all be placed inside the room. If you open the Rooms group in the asset browser, you will notice that there is already a room in there. This is because there needs to be at least one room for a Gamemaker game to run, so an empty room is created by default in each new project. Open up this room and you will see a big blank grid.

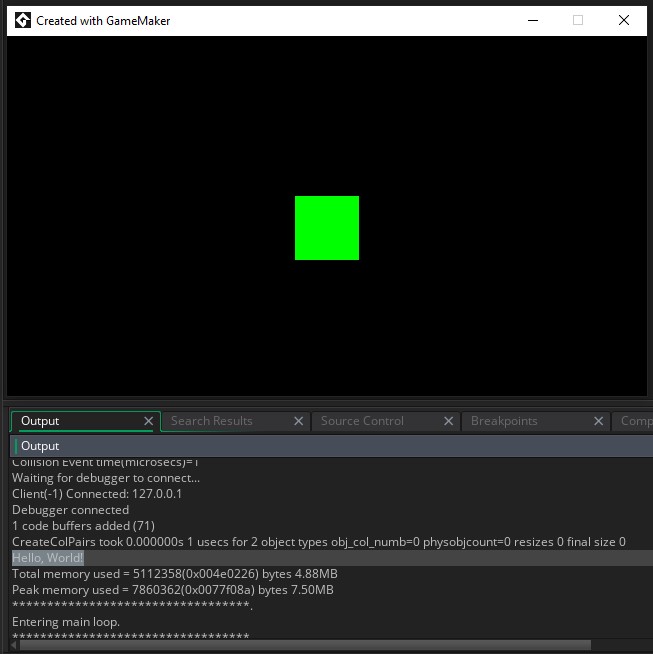
First, lets change the size of the room. By default rooms are 1366px x 768px, lets change it to 640px x 360px. Next, ensure that the Instances layer is highlighted in the inspector, then click and drag obj_player from the Asset Browser into the middle of the room. Finally, you are ready to run your first game! Click the bug icon on the top bar to launch the game in debug mode (this will generally result in quicker build times and allows debug messages, compared to the Run button). After a short wait while the game is built, you should see a black window with your green player in the middle, and "Hello, World!" in the output window of the bottom dock.

Congratulations on making your first game with Gamemaker! Although hardly impressive at this point in time, soon enough you will have an exciting game in your hands.